Step 3: Import Users
Step 3: Import Users
The final onboarding step is adding your team members. You have several options.
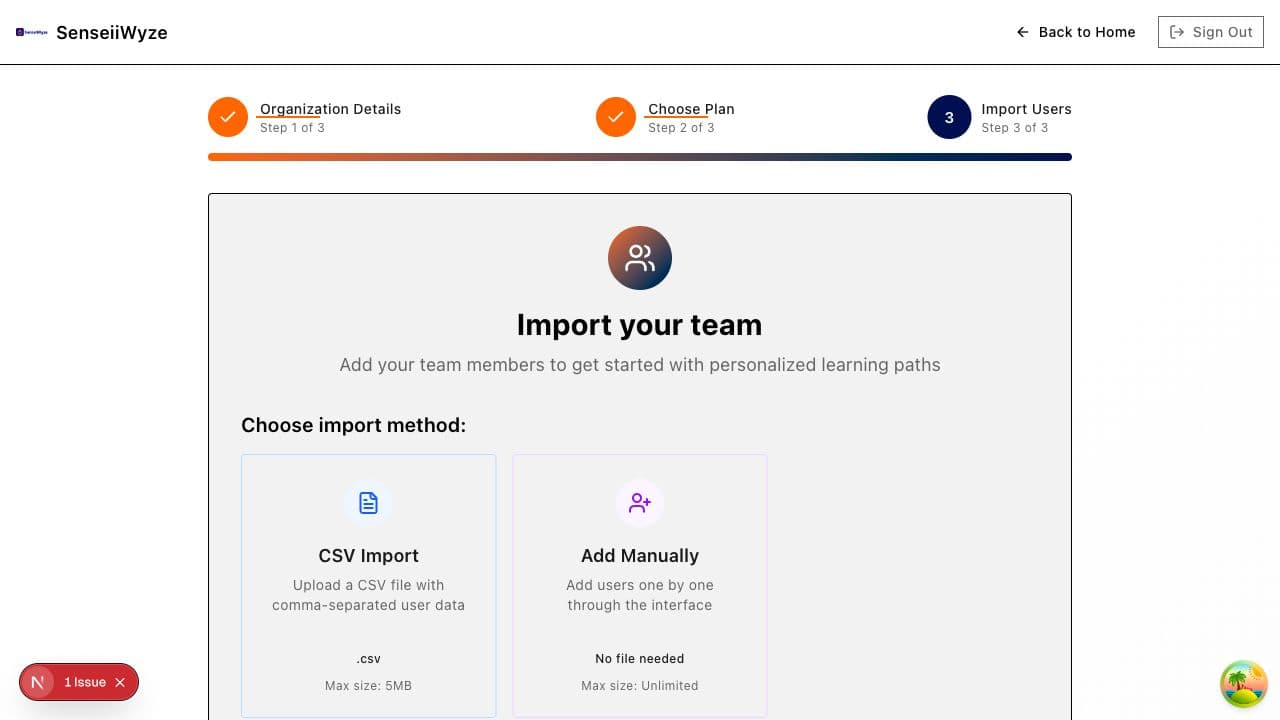
Import Methods
Manual Entry
Add users one at a time:
- Click Add User
- Enter email address
- Enter full name
- Select their role
- Click Add
- Repeat for additional users
Best for: Small teams or adding a few key users first.
CSV Import
Upload a spreadsheet of users:
- Click Import CSV
- Download the template (recommended)
- Fill in user information
- Upload your completed file
- Review and confirm the import
CSV Template Format:
email,name,role
john@company.com,John Smith,member
jane@company.com,Jane Doe,admin-manager
Best for: Medium to large teams with user lists in spreadsheets.
Excel Import
Upload an Excel file (.xlsx):
- Click Import Excel
- Download the template
- Fill in user information
- Upload your file
- Review and confirm
Best for: Teams already using Excel for user management.
Skip for Now
Not ready to add users?
- Click Skip
- You can add users anytime from the Users page
- Share your invite code for self-signup
Required Information
For each user, you'll need:
| Field | Required | Description |
|---|---|---|
| Yes | User's email address | |
| Name | Yes | User's full name |
| Role | Yes | Their permission level |
Assigning Roles
Choose the appropriate role for each user:
| Role | Description | Best For |
|---|---|---|
| Admin-Executive | Full access including billing | Executives, owners |
| Admin-Manager | User management, no billing | HR, team leads |
| Member | Standard access | Most team members |
| Learner | Limited, learning-focused | Training participants |
See User Roles for detailed permissions.
Seat Limits
Users count against your seat limit:
- Each imported user uses one seat
- Invited users count even before they accept
- Check your available seats before importing
Running low on seats? You can upgrade your plan or purchase additional seats.
What Users Receive
When you import users, they receive:
- Email invitation to join SenseiiWyze
- Link to create their password
- Information about your organization
After Import
Once users are imported:
- They appear as Invited in your user list
- They'll become Active after accepting the invitation
- You can track acceptance status in the Users page
Common Issues
"Email already exists" This email is already registered. The user may already be in another organization.
"Seat limit reached" You've used all available seats. Upgrade your plan or remove inactive users.
"Invalid CSV format" Check that your CSV matches the template format exactly. Common issues:
- Extra columns
- Missing required fields
- Special characters in email addresses
"Import failed" Try importing in smaller batches (50-100 users at a time).
Tips for Successful Imports
- Use the template - Download and use our template to avoid formatting issues
- Clean your data - Remove duplicates and invalid emails before importing
- Start small - Test with a few users before bulk importing
- Check roles - Verify role assignments before confirming
Need Help?
See Import Troubleshooting for detailed solutions to common import problems.