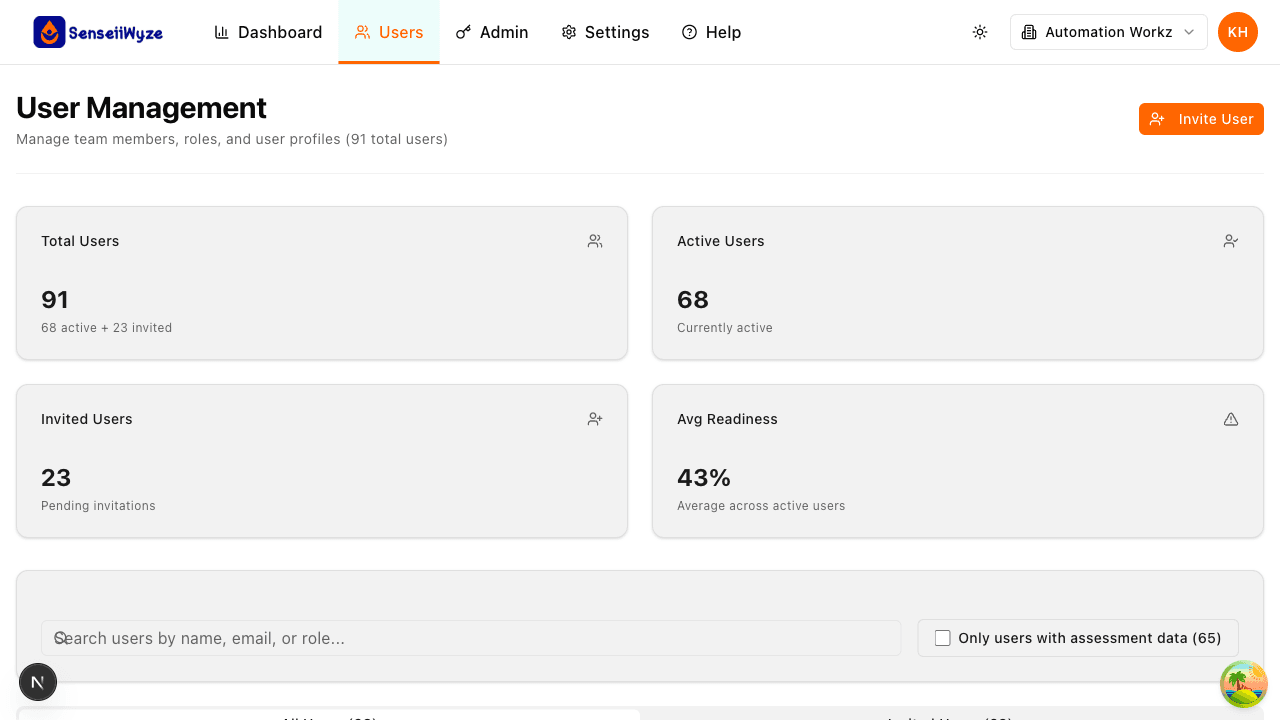
User Management
Inviting Users
Inviting Users
Add team members to your organization by sending email invitations.
Accessing the Invite Feature
- Click Users in the main navigation
- Click the Invite Members button
Invitation Methods
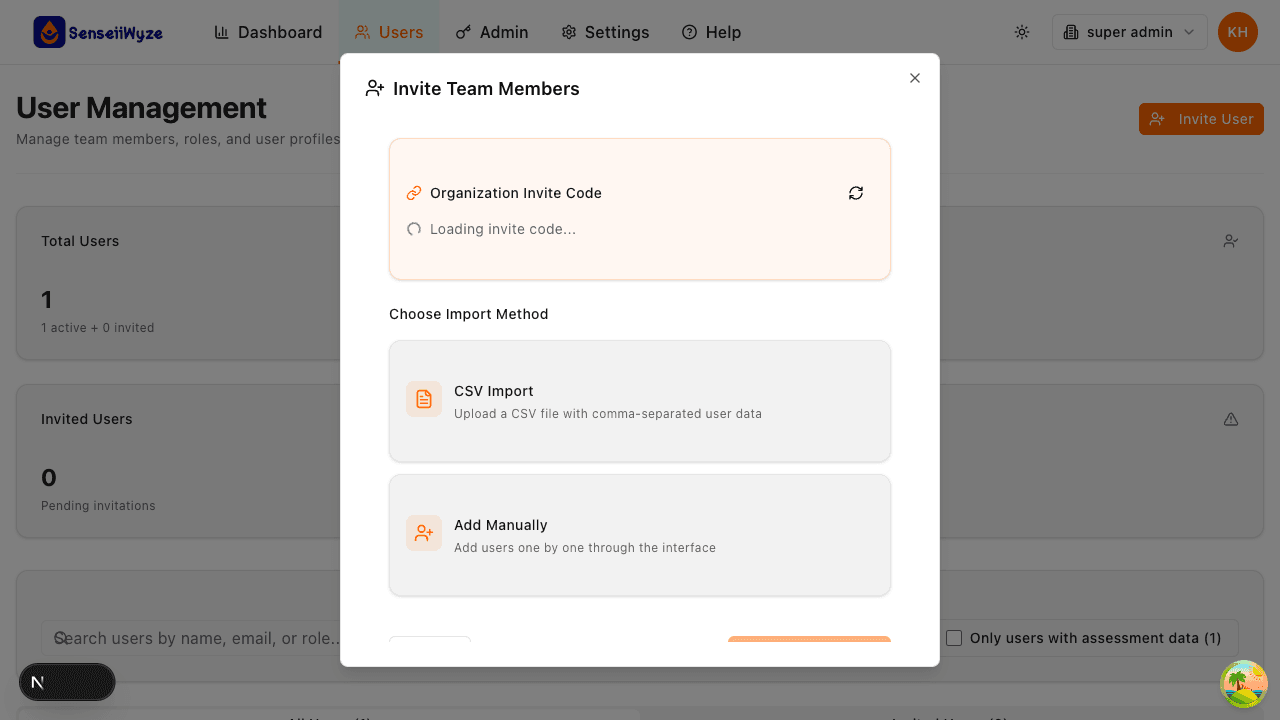
Single User Invitation
Add users one at a time:
- Click Invite Members
- Select Add Manually
- Enter the user's email address
- Enter their full name
- Select their role
- (Optional) Add department or team
- Click Send Invitation
Bulk Import (CSV)
Import multiple users from a spreadsheet:
- Click Invite Members
- Select Import CSV
- Download the template (recommended)
- Fill in user information:
email,name,role,department john@company.com,John Smith,member,Sales jane@company.com,Jane Doe,admin-manager,HR - Upload your file
- Review the preview
- Click Import Users
Bulk Import (Excel)
Import from an Excel file (.xlsx):
- Click Invite Members
- Select Import Excel
- Download the template
- Fill in the spreadsheet
- Upload your file
- Review and confirm
Required Information
| Field | Required | Description |
|---|---|---|
| Yes | User's email address | |
| Name | Yes | User's full name |
| Role | Yes | Permission level (see User Roles) |
| Department | No | Organizational department |
| Team | No | Specific team assignment |
What Happens After Invitation
- User receives an email with a signup link
- They appear as Invited in your user list
- Once they accept, they become Active
- They can immediately access their dashboard
Invitation Email Contents
The invitation email includes:
- Your organization's name
- A personalized welcome message
- A secure link to create their account
- Link expiration date (typically 7 days)
Seat Considerations
Before inviting users:
- Check your available seats in Settings > Billing
- Each invitation uses one seat
- Pending invitations count toward your limit
- Learn about seat management
Best Practices
- Use work emails - Avoid personal email addresses for better security
- Assign correct roles - Start with minimal permissions, upgrade as needed
- Organize by department - Makes reporting and management easier
- Follow up - Contact users who haven't accepted after a few days
Troubleshooting
"Email already exists" This email is registered in another organization. The user needs to use a different email or contact support.
"Seat limit reached" Upgrade your plan or remove inactive users to free up seats.
"Invalid email format" Check the email address for typos or invalid characters.
User didn't receive the email
- Check their spam/junk folder
- Verify the email address is correct
- Resend the invitation
Need Help?
- Managing Invitations - Resend or cancel invites
- User Roles - Understanding permissions
- Invite Codes - Self-service signup option